JAVA多线程编程
观看 狂神说 视频 总结
1. 创建方法
1.继承自Thread类
重写run方法 并调用 .start()方法
代码:
1
2
3
4
5
6
7
8
9
10
11
12
13
14
15
16
17
public class MyThread extends Thread {
public void run() {
for (int i = 0; i < 20; i++) {
System.out.println("子线程执行" + i);
}
}
public static void main(String[] args) {
MyThread myThread = new MyThread();
myThread.start();
for (int i = 0; i < 2000; i++) {
System.out.println("主线程执行" + i);
}
}
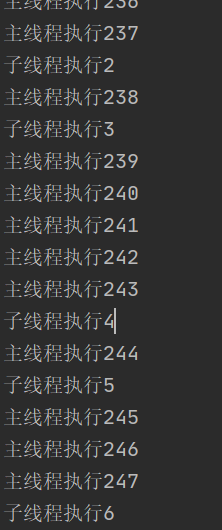
}执行结果图:

分析:
主线程与子线程走走停停的状态 交替执行
2.实现Runable接口
定义MyRunable接口实现Runable接口,实现run方法(线程体),创建线程对象,并调用start方法启动线程
代码
1
2
3
4
5
6
7
8
9
10
11
12
13
14
15
16
17
18
public class MyThread2 implements Runnable {
public void run() {
for (int i = 0; i < 200; i++) {
System.out.println("---子线程执行" + i);
}
}
public static void main(String[] args) {
MyThread2 myThread2 = new MyThread2();
Thread thread = new Thread(myThread2);
thread.start();
for (int i = 0; i < 2000; i++) {
System.out.println("主线程执行"+i);
}
}
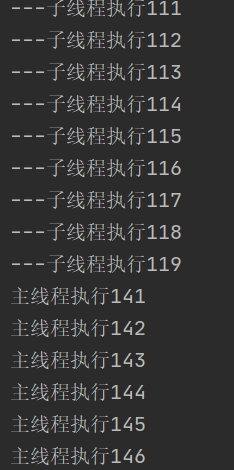
}执行结果图

分析
线程不是创建好以后就直接去执行的,而是等待CPU的调度。主线程与子线程是交替执行的
3. 实现Callable接口
好处
- 可以定义返回值类型
- 可以抛出异常
过程
- 创建服务
- 提交执行
- 获取结果
- 结束服务
代码
1
2
3
4
5
6
7
8
9
10
11
12
13
14
15
16
17
18
19
20
21
22
23
24
25
26
27
28
29
30
31
32
33
34
35
36
public class ThreadCallable implements Callable<Boolean> {
private String name;
public ThreadCallable(String name) {
this.name = name;
}
public Boolean call() throws Exception {
for (int i = 0; i < 20; i++) {
System.out.println(this.name + "--->" + i);
}
return true;
}
public static void main(String[] args) throws ExecutionException, InterruptedException {
ThreadCallable callable1 = new ThreadCallable("1号");
ThreadCallable callable2 = new ThreadCallable("2号");
ThreadCallable callable3 = new ThreadCallable("3号");
//创建执行服务
ExecutorService service = Executors.newFixedThreadPool(3);
//提交执行
Future<Boolean> r1 = service.submit(callable1);
Future<Boolean> r2 = service.submit(callable2);
Future<Boolean> r3 = service.submit(callable3);
//获取结果
boolean res1 = r1.get();
boolean res2 = r2.get();
boolean res3 = r3.get();
//关闭服务
service.shutdown();
}
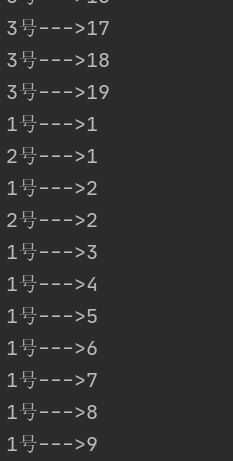
}运行结果
